Custom Embeddings
Welcome to the first applied part of this tutorial. Here I will show you how you can use GloVe to create your own custom embeddings. First we have to start by finding and prepping our data.
Prepping your Data
For demonstration purposes, I have created a dataset for you from scratch. You can find the prepped dataset for vectorization in the repository for this page in the vector_tokens file. But if you would like to know how to prep your data yourself, here is a quick rundown on what I did:
Find a source for your data
First, you will need to find the data you want to work on. It is important to use the right dataset for your usecase. For example, if you want to create some application that deals with Gen Z slang, then the Wall Street Journal Corpus is not going to be a good source for your data.
I simply downloaded a series of books from Project Gutenberg, which is a library for books in the public domain. Since all the books used are in the public domain, you can find my dataset in the repository. With our later evaluation method in mind, I downloaded a series of English, French, and German language books. I used some of them for training data and set some aside for later testing. Here are the books used:
- English: A Tale of Two Cities - Dickens, The Adventures of Sherlock Holmes - Arthur Conan Doyle
- French: Les misérables Tome V: Jean Valjean - Victor Hugo, Eureka - Edgar Allan Poe (French), Les Trois Mousquetaire - Alexandre Dumas
- German: Sämmtliche Werke 3: Abende auf dem Gutshof bei Dikanka - Gogol (Translated by Frieda Ichak), Celsissimus - Arthur Achleitner, Wunderbare Reise des kleinen Nils Holgersson mit den Wildgänsen - Selma Lagerlöf (translated by Pauline Klaiber) You can find these books in .txt format in the test and training folders of this repository.
For later testing purposes, I also created a file that only contains tokens which are not in the intial training data. For more information see the preprocessing script
Preprocess your data
Depending on the type of embedding you are aiming for, you will need to preprocess your data differently. GloVe will assume that every word is seperated by a space. So if you would like to do word-level embeddings, then you need to make sure each word is seperated by a space, and each sentence is seperated by a newline.
If you are doing character-level embeddings, this becomes a little bit more tricky. If you are doing character unigrams (i.e. treating each character seperately) You will need to make sure every character is seperated by a space. If you are doing character bigrams you need to make sure every second character is seperated by a space, and so on and so forth. Your words should be seperated by newlines. However, this also depends on what you are planning to do with your vectors. If you want a greater context window for your characters than a single word, then you will need to decide how many words you would like per line.
For this tutorial we are doing character unigrams and one word per line. This is because we need that style of representation for our evaluation task later. there is a preprocessing script in this repository. But, all the data is already processed, so you do not need to run it. At the end of your preprocessing, you want a file that looks like this, if you want character-unigrams.
Here is a short code-snippet from the preprocessing script that shows you one way of prepping this type of data:
tokenlist = []
for file in training: #there are 3 files in this list
	f=open(file,'r', encoding='utf-8')      # read in the file, make sure to mark as utf8
	file = f.read()
	f.close()
	tokens= tokenizer.tokenize(file)
	tokens = tokens[400:-5000] #clearing out the Gutenberg parts
	tokenlist.append(tokens)
tokens = [*tokenlist[0],*tokenlist[1],*tokenlist[2]]
#print(tokens)
tokenfile= open('vector_tokens.txt','w+', encoding='utf-8')
for token in tokens:
	token = [i+" " for i in token.lower()]
	for i in token:
		tokenfile.write(i)
	tokenfile.write("\n")
tokenfile.close()
Now that we have found and prepped our data, we can move on to clone the GloVe repository.
Downloading and Using the GloVe Implementation
This part of the tutorial will assume you are either on Ubuntu, or another Linux distribution and have a c-compiler and git installed and know how to use it. No guarantees can be made for windows or iOS users. If for some reason you cannot run a bash-shell script, you may try this library instead.
Cloning the GloVe repository
First we need to clone or download the GloVe repository. If you have git, you can just call:
git clone https://github.com/stanfordnlp/GloVe
Else, you can follow that url and download the repository manually.
Next, you will need to get your data. If you want to follow along with the dataset I provide here, you can go ahead and clone this repository as well:
git clone https://github.com/remo-help/character-embedding-with-glove
Now we need to move the dataset you want to work with into your GloVe repository. If you use my dataset, you can copy it over manually, or call this command:
cp tutorial-directory/data/vector_tokens.txt glove-directory/vector_tokens.txt
##assuming tutorial-directory and glove-directory are variables pointing to those directories
Next, you need to return to the directory to which you downloaded the GloVe repository. Then you need to make a copy of the demo.sh file (which we will call “my_embeddings.sh).
cd glove/
cp demo.sh my_embeddings.sh
Now open “my_embeddings.sh” in the editor of your choice. You will see a bunch of code that may mean more or less to you depending on your level of experience. But, not to worry, you really only need to worry about the “corpus” and “save_file” parameter:

Go ahead and change the corpus parameter from “text8” to “vector_tokens.txt” (or whatever you named your data-file). Be aware that this only works if you copied that file into the glove directory correctly. Then change the “save_file” parameter to the filename you would like your vectors to be saved as. I named mine “dickens_vectors.txt”, but you can name yours whatever you like. If you would like to replicate my results in the evaluation part, you should also change the “window_size” parameter to 10 (from 15). This defines the size of the window the glove algorithm looks at.
Now that you have done this, all you need to do is call the following command (assuming you are on Linux):
bash my_embeddings.sh
This shell script will compile a series of c-scripts for you, which in turn will calculate your glove vectors. If you are using my file, then this will finish within seconds. If you are using a larger file, this might take some time.
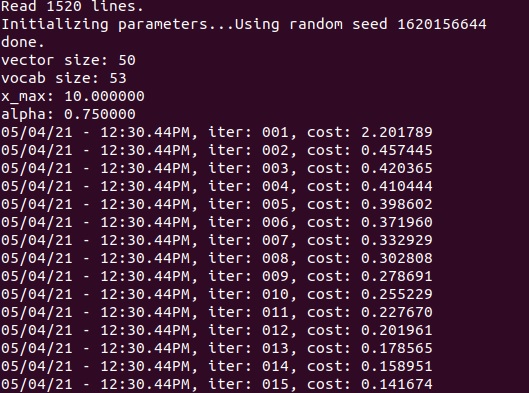
Once you arrive at iteration 15 (or later if you changed the MAX_ITER parameter), you are finished. Congratulations, you have just created your own custom GloVe embeddings. You can find your embeddings file in the glove directory, under the name you defined in the “save_file” parameter.
If you would like to continue the tutorial, please continue to the next page, where I discuss how to evaluate our custom vectors.